The blog in this article talk about the best way to replace the windows. The goal of Windows Hamilton is to win your trust and inform our customers about the things we do, so you don’t have to use our services!
We’ll be sharing a variety of tips as well as tricks and blogs in the coming months to show you how to make improvements to your home!
In this blog, we’ll explain how to replace the windows in your house. On our scale of difficulty of 1-10 for homeowners, the project would be at a level of 6. While it’s not the most challenging home improvement project, however, caution and supervision must get taken into consideration before tackling. Follow our step-by-step guidelines, and you’ll be able to replace windows within a matter of minutes! Thanks to our Windows Hamilton team.
Step-By-Step Instructions for Replacing a Window
Get Rid of the Old Window
It is good to consider an existing window replacement if you plan to replace the entire Window. Stock replacement windows are made to order and measured to sizes available in stock. When you buy a replacement window from the store, you can make a few changes to the window frame; however, it should cost less than a custom-designed window to fit your house.
Take off the casing with a crowbar, including the trim and sill plate.
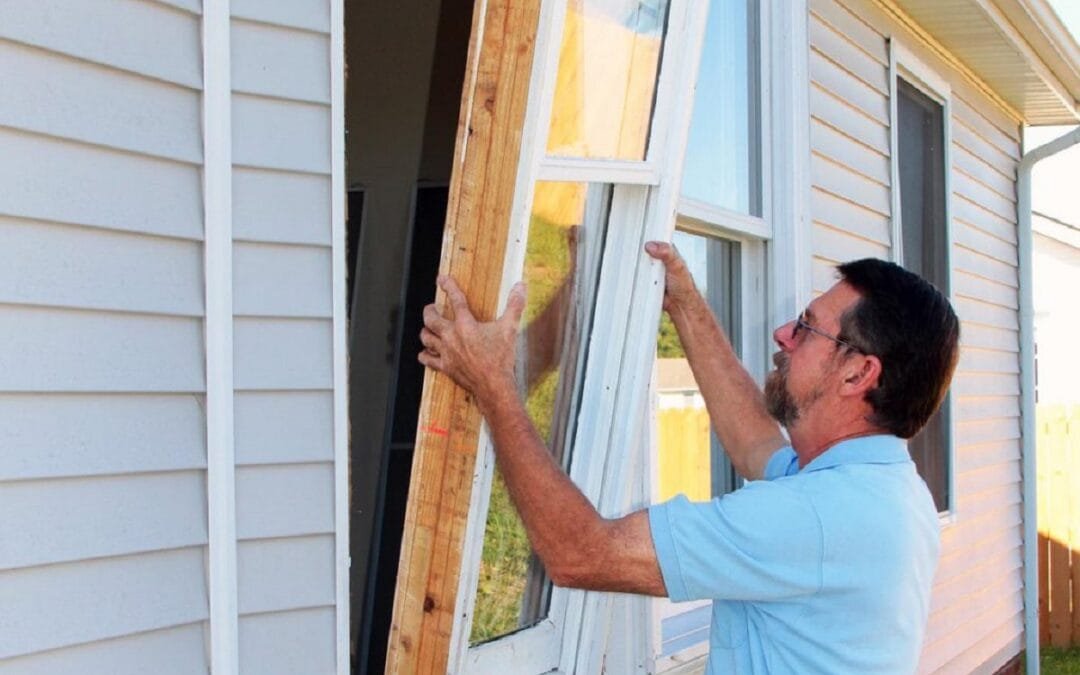
Modify the Window Frame
When you’ve taken down the casing of your Window, it is essential to be looking to ensure that the headers and the studs are square and plumb and that the frame is in line with the exact dimensions of your new Window. It is possible to add new boards to the structure and remove a section of siding on the outside to accommodate the measurements. To make further adjustments and add insulation, you should leave about 1/4 inch space across all sides.
Install the New Replacement Window
Install the Window on the home’s exterior and press it to the frames. Once it gets placed in a good position relative to the surface, fix it in place using screws or nails. Install the Window with screws to ensure you set it to a specific wood part. Make adjustments to the Window so that it’s square by moving the screws individually and then using shims on any points that require adjustment.
Cover the New Window
Once your Window is square, plum, re-adjusted, and fixed into its proper position, put an additional layer of window wrap to the fins of your Window. Be sure that you cover all areas by overlapping the wrap.
One of the main elements is keeping moisture out. To do this, make sure you ensure that the wrap stays straight and in line with the frame of your Window and do not allow it to wrinkle or fold over itself.
Make Sure That The Window Is Adequately Insulated
Apply expanding foam sealant to the space between the Window and casing to protect the new Window. The Window’s edges should get covered with the painter’s adhesive to protect the Window’s surface. Once the foam is dried, it’s necessary to scrape it off using the help of a knife.
Be cautious about adding excessive foam as it could make the Window bow and stop it from functioning correctly.
Replace the Trim and Casing
Once the foam is dry, cut off the excess and install the new casing inside the Window. If needed, you can replace the exterior trim.
You Can Give Yourself a High-Five and Enjoy a Cold Drink!
If you’ve completed all seven steps on how to replace a window, congrats! If you have trouble with all the steps, be sure to contact Windows Hamilton for an appointment. Our experienced window installers possess the expertise and experience to complete any window-related task. For more information, call us at (289) 975-4020 or send us an e-mail at sales@windowshamilton.ca.